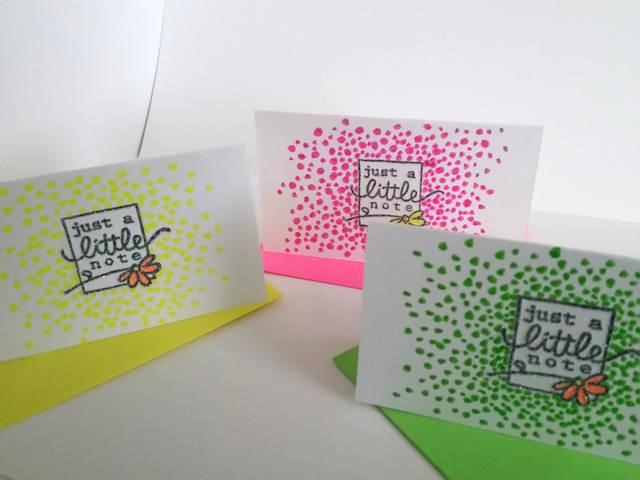
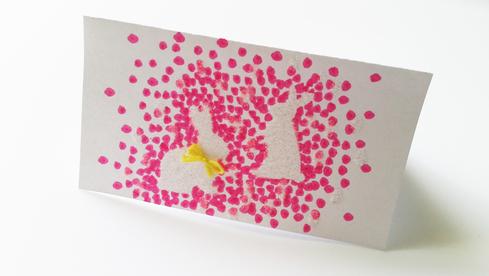
This simple technique can be applied in so many ways! Here's a couple of my favorites... be sure to check out our DIY Glue Pad tutorial to really make your card stand out!
Supplies and Materials:
-Miniature cards and envelopes (Pictured: 2.5"x4.25")
-Marker(s) (I used highlighters to match the neon envelopes I used)
-Stamp or die cut of your choosing
This technique is pretty simple and straight forward, but it's how you apply it that makes it special. I like pairing it with my favorite stamps or die cuts, then adding a textured layer for some extra pizzazz. If I'm using a stamp -- I usually go with a glitter layer, however sometimes I use a little Diamond Glaze or Glossy Accents to make some three dimensional dots!
Begin by making a dotted border around the stamped image. I found some adorable neon envelopes on Amazon, so I used some highlighters in matching colors to make my cards match the envelopes. If you're using a die cut, tape it in place with a little scotch tape on the back and draw your dotted line around the edges. Be sure place the dots closely, especially with the die cut version, so that when the die cut is removed you can easily see all the detail of the image left behind.
From your dotted border, extend your dots out to the edge of your card/workspace, then return to the center and add more layers of dots to achieve the desired gradient.
Add extra depth and dimension to your project by layering other textures. Try using a DIY glue pad to take your stamping to the next level, or use a glue pen to help you detail your negative space with fine glitter or flocking. For the above bunny card, I added a layer of glittered dots and filled in the bunnies with Crystal Diamond Very Fine Glitter. Adding an accessory like a bow can help really make your card pop!
Card - Lots of Dots
You might
also enjoy...
If you enjoyed our tutorial or found value in it, we'd love it if you'd give us a thumbs up or a share on Facebook or Pinterest!
Disclaimer: Please note that some of the links in this post are affiliate links. There is no additional cost to you, but The Scrap Room will earn a small commission should you choose to purchase through those links. Thank you for helping support our business!


