You might
also enjoy...
Create your own custom gifts
Looking for inspiration for handmade gifts using digital designs? Here's some budget friendly options!
With a few simple tools you can make some pretty amazing custom gifts all by yourself! Download designs from your favorite artists online, or create your own (you can find tutorials in my Digital Library here) and make your own personalized shirts, hats, mugs, canvases, bags and more! Perfect for wedding and party favors, birthday and holiday gifts, gifts for him, gifts for her, gifts for friends and family -- the sky is the limit!
If you enjoyed my page or found value in it, I'd appreciate it if you gave it a little love on social media!
Disclaimer: Please note that some of the links in this post are affiliate links. There is no additional cost to you, but The Scrap Room will earn a small commission should you choose to purchase through those links. Click here for my full disclaimer. Thank you for your support.
When it comes to items you can iron designs on to... there are SO. MANY. to choose from! If you're on a tight budget, this is such a great way to make every dollar streeetch! Check out some of my favorite budget friendly picks below! Then go make special personalized gifts for all your friends and family this season! They'll love that you went the "extra mile" to make something really special for them, and your bank account will appreciate it!
Make sure you follow the directions on your EasyPress, but it's super simple to use! The EasyPress works as a heat press but with the ease of an iron, and it comes with a handy reference chart so you can check the time and tempurature to set it for for the project you are doing. Line it up, let her cook, and admire your work! It produces professional results every time!
I'd love to see what you create! Come share pics of your projects in our Facebook group DIY Projects and Craft Chat!
If you haven't already picked up a Cricut EasyPress, I highly recommend it! It will make so many of the projects on this page SO MUCH EASIER! It's also hugely safer than trying to iron on your designs with a standard iron! It has a HUGE base, and covers an area of 9" x 9" so you can do most of your designs in one simple press. (It also adheres images on in a minute or less and even has an auto shut off feature for safety!)
You'll also want to pick up these Teflon transfer sheets to protect your work space. They're super cheap and they can be reused over 1000 times EACH -- so that's 3000+ Iron on projects for less than $10 on Amazon (22 Oct 2018).
Next you'll need to pick out a design to use, and a project to make. If you don't have an electronic cutting machine, you'll have to cut your design out by hand. I recommend making an SVG compatible cutting machines a priority on your crafting "WANT LIST". They've really come down in price and you can get this Cricut machine on Amazon for a little more than $220! (Free shipping if you're a Prime member!) ;)
Once you figure your design and project out, select the Iron-On sheets for the job! You can buy it in a variety of colors, textures, and prints -- including GLITTER!
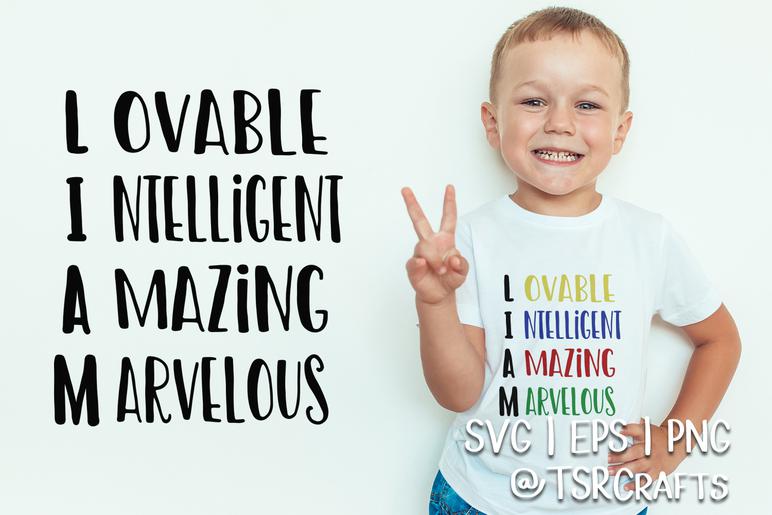
Above is a shirt I made for a sweet little boy named Liam. Remember, when you're doing iron on, you'll need to cut out the design in mirror image, so when you iron it on to your shirt, all the letters go the right way.
Follow the heat and time recommendations on the vinyl you purchase, and make sure you let everything COOL COMPLETELY before you remove the protective plastic layer.
When you give custom vinyl items as gifts, always remember to also share care instructions. Custom vinyl items like this shirt above must be washed on cold, inside out, and tumbled dry on low, or better yet, LAY FLAT TO DRY.
I keep a large piece of the left over protective plastic on hand just in case something happens and I need to re-iron down an edge. (Laundry accidents do happen sometimes - we all get distracted from time to time, and kids will be kids...) but with proper care, vinyl shirts and other decor items will last a while (though not forever.)


